“Clenis – Cleaning Services Wordpress Theme
Clenis – Cleaning Services Wordpress Theme
Created: 24/Apr/2024
By: 4damsthemes
Email: 3damstheme@gmail.com
Thank you for purchasing our Clenis – Cleaning Services Wordpress Theme. If you have any questions that are beyond the scope of this help file, please feel free to email via our user page contact form here. Thanks so much!
Table of Contents
Installation - top
-
Extract Package:
After download completed, you need to unzip the package and select the way you want to install the theme.

Once the download is complete, unzip the file and you would see the following packages:
- Documentation - our detail documentation for the theme
- Licensing - the theme license
- Demo Data - the demo data of the demos, you can import it
- Theme - for manual installation
-
Theme Installation via WordPress:
Please, follow the steps below to install Megla Theme (Make sure you had extract files).
- Step 1 - Login to your WordPress Dasrdoard.
- Step 2 - Navigate to Appearance ► Themes.
- Step 3 - Click Add New button on top of the page.

- Step 4 - Then click Upload Theme.
- Step 5 - Next, Browse to the zip file and click Install now for the theme to be uploaded and installed..
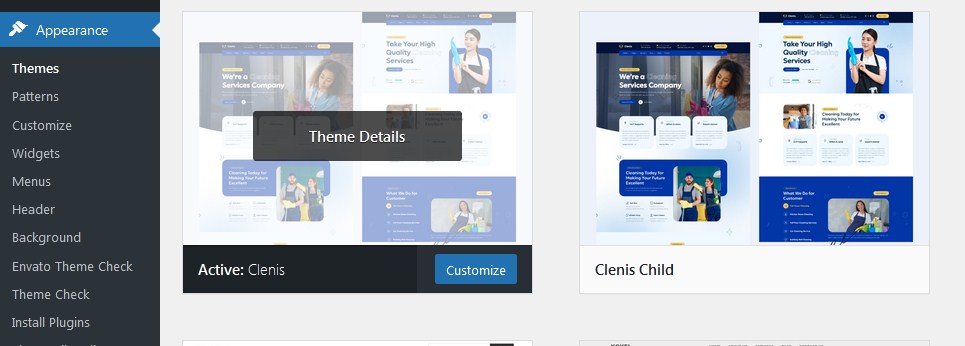
- Step 6 - After done installing, click Activate the theme.
Important Note:
You need install all required plugins after install parent theme. You should only install Child theme after complete install all required plugin.
-
Theme Installation via FTP:
Using an FTP software like File Zilla or CuteFTP to upload the theme files to your WordPress site.The first, extract the theme file "clenis.zip", you will have a folder "clenis" include all theme files and folders (css, images, fonts...).
Please, follow the steps below to install the theme via FTP:
- Step 1 – Log into your hosting space (server) via FTP client.
- Step 2 – In extracted archive folder, find clenis.
- Step 3 – Upload the clenis folder to your server in path ROOT/wp-content/themes/.
- Step 4 – The uploaded path should be like this: ROOT/wp-content/themes/clenis/.
- Step 5 – Login to your WordPress Dasrdoard and go to Appearance ► Themes and activate the clenis theme..
-
Installation Plugins:
Please, follow the steps below to install required plugins:
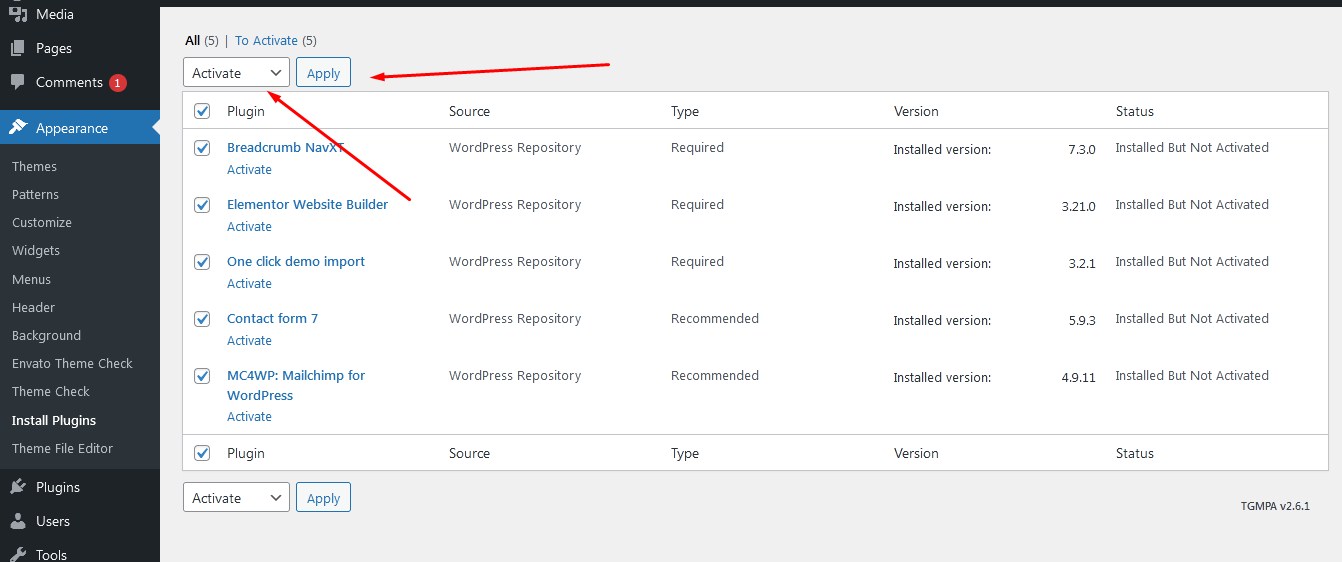
- Step 1 – After activating the theme, you will be asked to installed the required and recommended plugins, you can proceed by clicking on Begin installing plugins

- Step 2 – In the next page, check all the plugins that you want to install then on the drop down Bulk Actions, choose Install then click Install, the plugin installation process will start.

- Step 3 – Check all the plugins that you want to activate then on the drop down Bulk Actions, choose Activate and click Apply, the plugin installation process will start. Wait for all the plugin activated then you can start customizing your website as you wish.
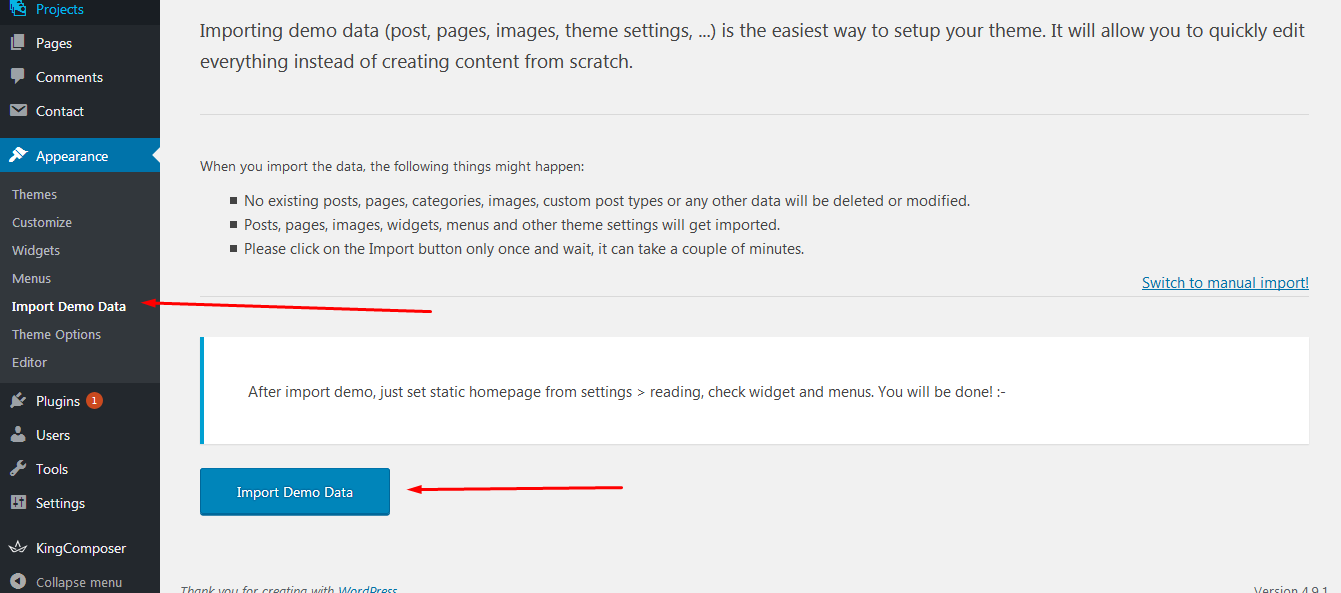
Install Demo Data - top
We very happy to provide for customer a new function to import data more quickly. It is "One click import"
With "One click import", customer do not import step by step data as import usual. It import all data like : Content, Widget, Revolution slider, Menu, Customize...
-
One click Import Demo Data:
- Step 1 - Login to your WordPress Dasrdoard.
- Step 2 - Go to Appearace > Import Demo Import.
- Step 3 - Install Demo Data.
- Step 4 - Wait to importing success.
- Step 4 - Wait to importing success.
Theme Configuration - top
-
Set Up Logo:
You can upload your logo image in the Theme Options. If the logo is not uploaded, then your site name will be used.Please, follow the steps below to upload your logo:
- Step 1 - Login to your WordPress Dasrdoard.
- Step 2 - Go to Theme Options > Logo Settings.
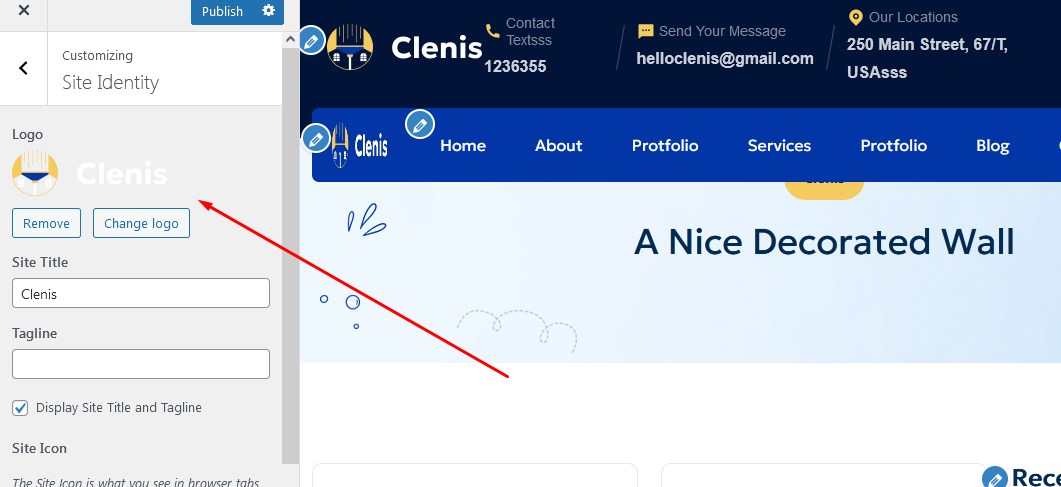
- Step 3 - Upload your logo by clicking on Select Image ( our current megla logo is 150px x 50px ).

-
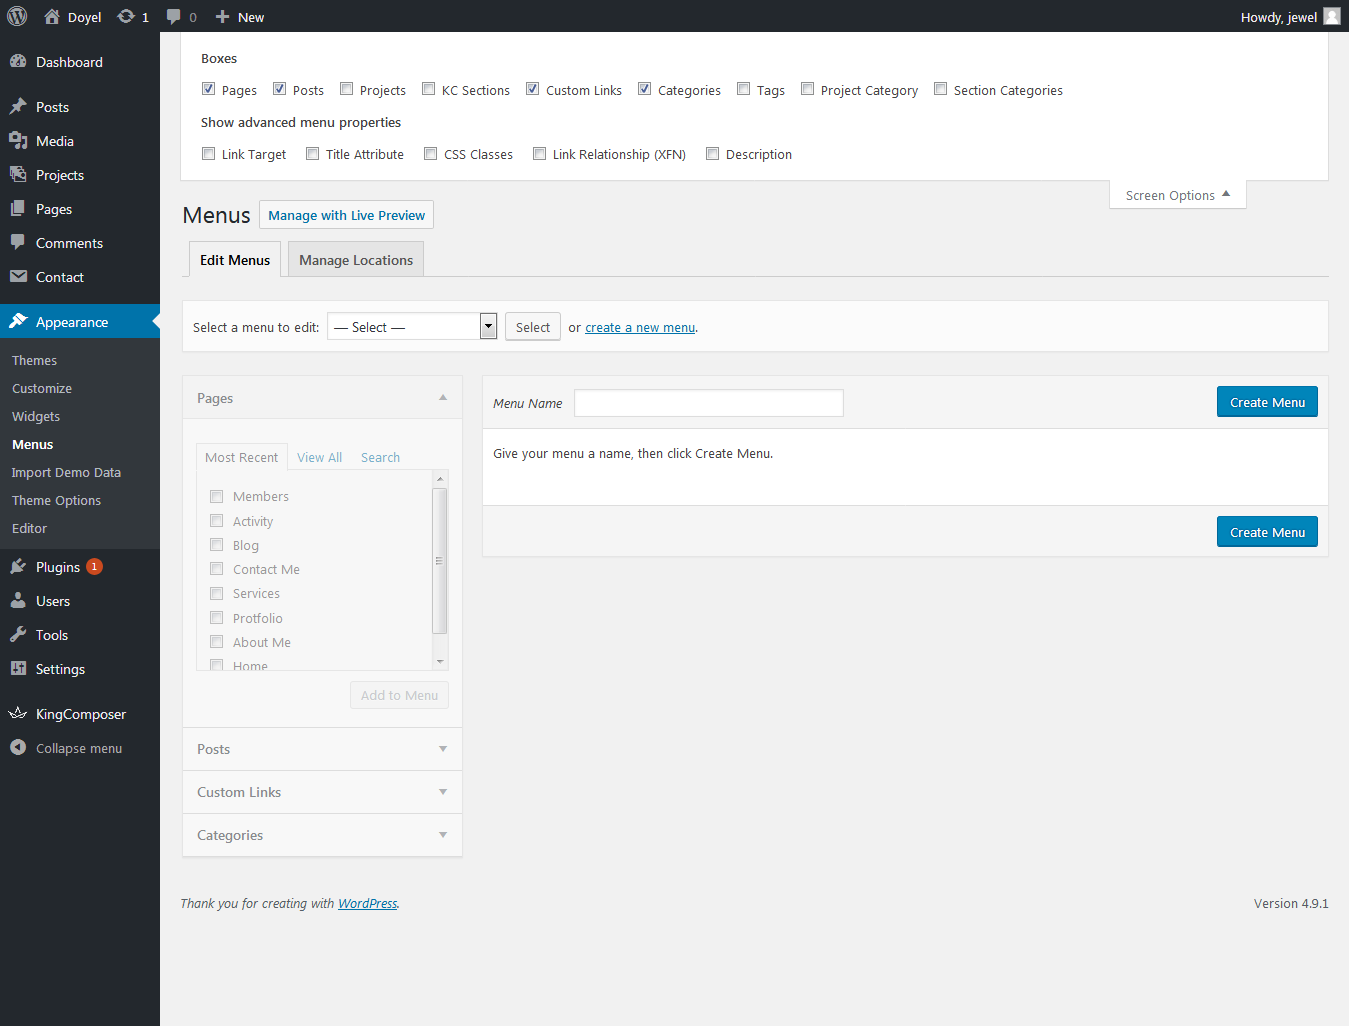
Set Up Menu:
-
Creating your menu
- Step 1 - Login to your WordPress Dasrdoard.
- Step 2 - From the 'Appearance' menu on the left-hand side of the Dashboard, select the 'Menus' option to bring up the Menu Editor.
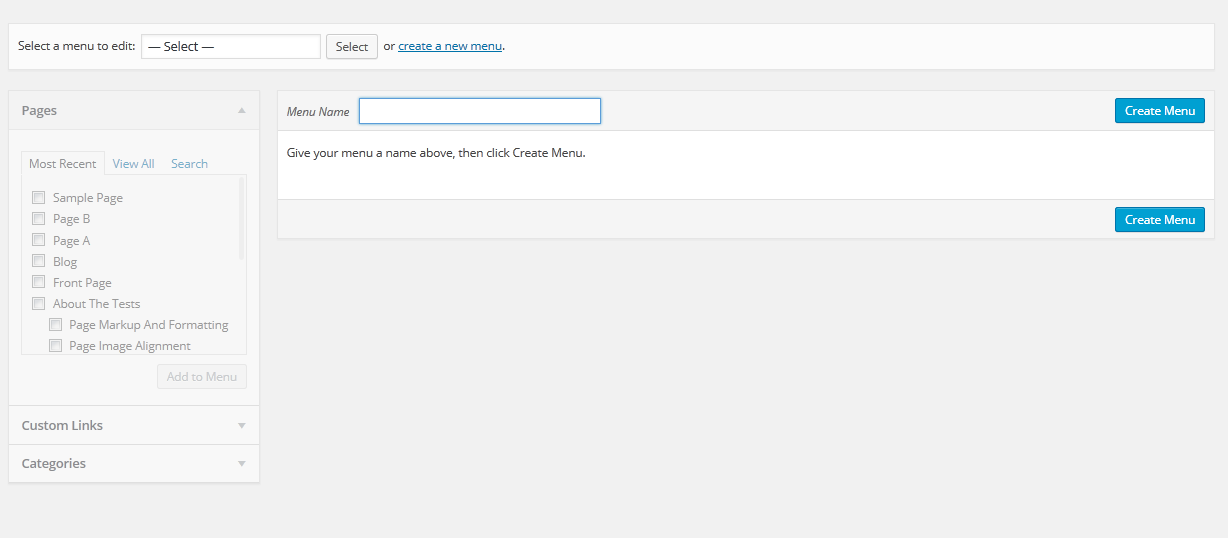
- Step 3 - Select Create a new menu at the top of the page.
- Step 4 - Enter a name for your new menu in the Menu Name box.
- Step 5 - Click the Create Menu button. Your menu is now defined, and you can now add pages to it (steps below).
-
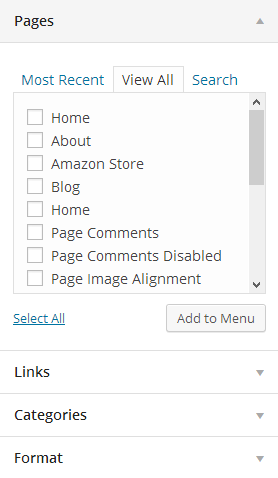
Adding pages to your menu
- Step 1 - Locate the pane entitled Pages.
- Step 2 - Within this pane, select the View All link to bring up a list of all the currently published Pages on your siter.
- Step 3 - Select the Pages that you want to add by clicking the check box next to each Page's title.
- Step 4 - Click the Add to Menu button located at the bottom of this pane to add your selection(s) to the menu that you created in the previous step.
- Step 5 - Click the Save Menu button once you've added all the menu items you want. Your custom menu has now been saved.
The Screen Options allow you to choose which items you can use to add to a menu. Certain items, like Posts or Products are hidden by default. The Screen Options are located in the top right corner of your WordPress Dashdoard
-
Assigning a Menu to a Location
Once you've created a menu and filled it with items, it's time to assign it to one of the theme pre-defined locations.
- Go to Appearance > Menus and click Manage Locations.
Menu is assigned after import data by "One click import".
-
-
Set Up Home Page:
You can quickly build a home page using Visual Composer for WordPress that is drag and drop frontend and backend page builder plugin that will save you tons of time working on the site content. You will be able to take full control over your WordPress site, build any layout you can imagine – no programming knowledge required
From your Dashboard admin Navigate to Pages
- Select All Pages to see all page then click edit one page you want
- Select Add New to create new pageOne page always include a lot of parts like Header , Main Page, Widget Sidebar and Footer. In that section we guide you create Main page by using Elementor.
- How to use king Composer?
-
Backend Editor Mode
Drag and drop elements you need to build your page layout.

-
How to use Back End Mode
-
Add and modify Row Layout
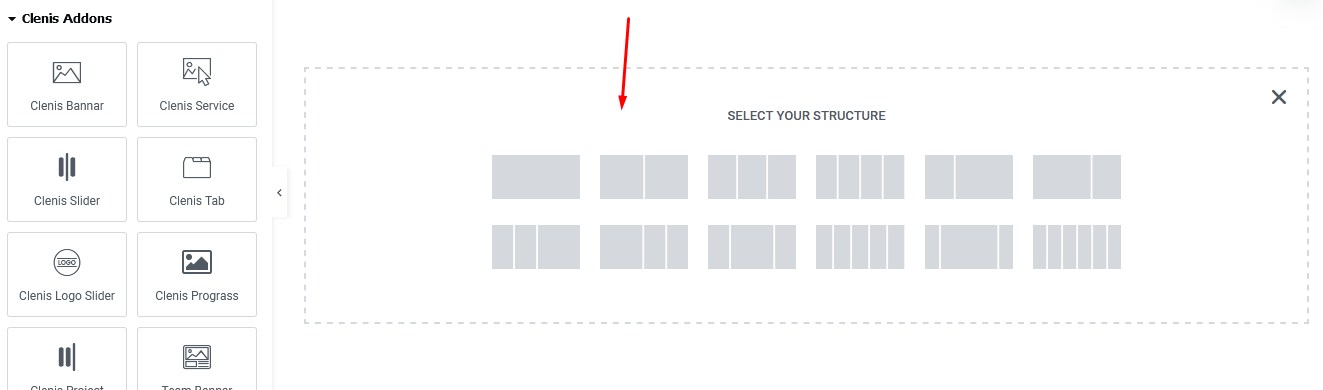
- Step 1 - Go to your page / post, first activate the backend editor and click Add Element
- Step 2 - Select the Elements you want to use.
- Step 3 - Click on the Edit This Row (plus icon) to Edit the Row element ( in our example we use blog addon ).


-
Edit Element
Pencil Icon - To Edit Row, Column or Module you need to click the Pencil icon.
-
Duplicate Element
Pages Icon - To Duplicate Row or Module you need to click the Pages icon.
-
Remove Element
Trash Box Icon - To Remove Row, Column or Module you need to click the Trash Box icon.
-
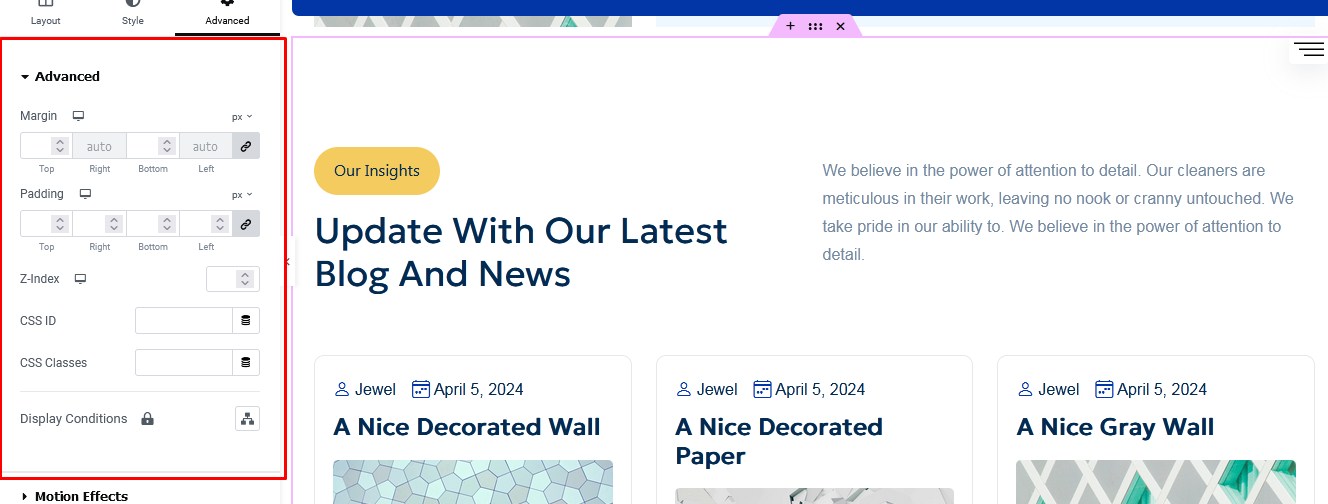
About Elementor Addon options
Design Options - When you edit service addon module, you can edit the design options.
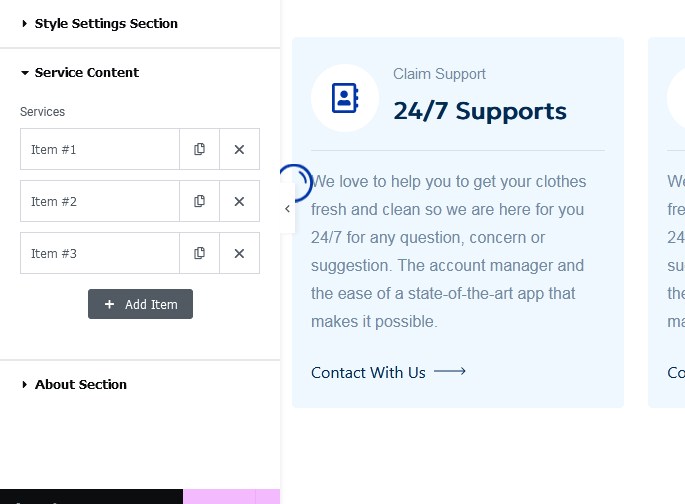
It is Good to add bottom Padding to your Column, so they will looks good on mobile
-
-
Have you ever used Elementor ? Please follow that guide first : Elementor guide
-
Page Options:
-
Page Attributes
You can select page attributes. Each Page have each styles

-
Set a page as Home Page
- Step 1 - Go to Settings > Reading in your WordPress Dashboard panel.
- Step 2 - Set "Front page displays" to a "Static Page".
- Step 3 - In the drop down menu for "Front Page" choose a page which will be your home page.
- Step 4 - Leave the drop down menu for "Posts page" empty, as this is not used by the theme.
- Step 5 - Save changes.

-
-
Set Up Blog Page:
-
Create the blog post
- Step 1 - Log in to your WordPress Administration Panel (Dashboard)
- Step 2 - Click the 'Posts' tab.
- Step 3 - Click the 'Add New' sub-tab.
- Step 4 - Start filling in the blanks: enter your post title in the Heading block, and enter your post content in the paragraph block.
- Step 5 - As needed, select a category, add tags, fill in the meta setings below the editor.
- Step 6 - Upload a featured image for your Post.
- Step 7 - When your post is ready, click Publish.

-
Manager current all blogs
Navigate to Posts → All Posts
You can see all informations of you blog post, add new, edit or delete them.

-
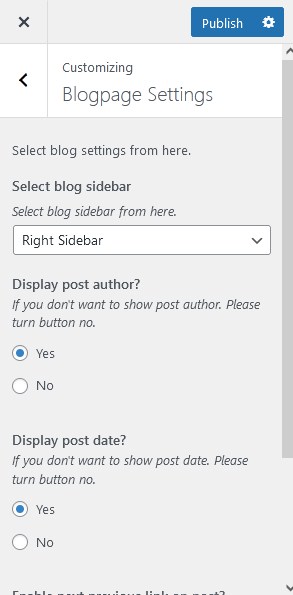
Blog Setting in the theme options
- Step 1 - Login to your WordPress Dasrdoard.
- Step 2 - Go to Theme Options > Blog Settings.
-
-
Set Up Contact Page:
-
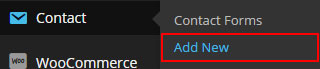
Create Contact Form:
Make sure you install and active Contact Form 7 plugin to continue reading.
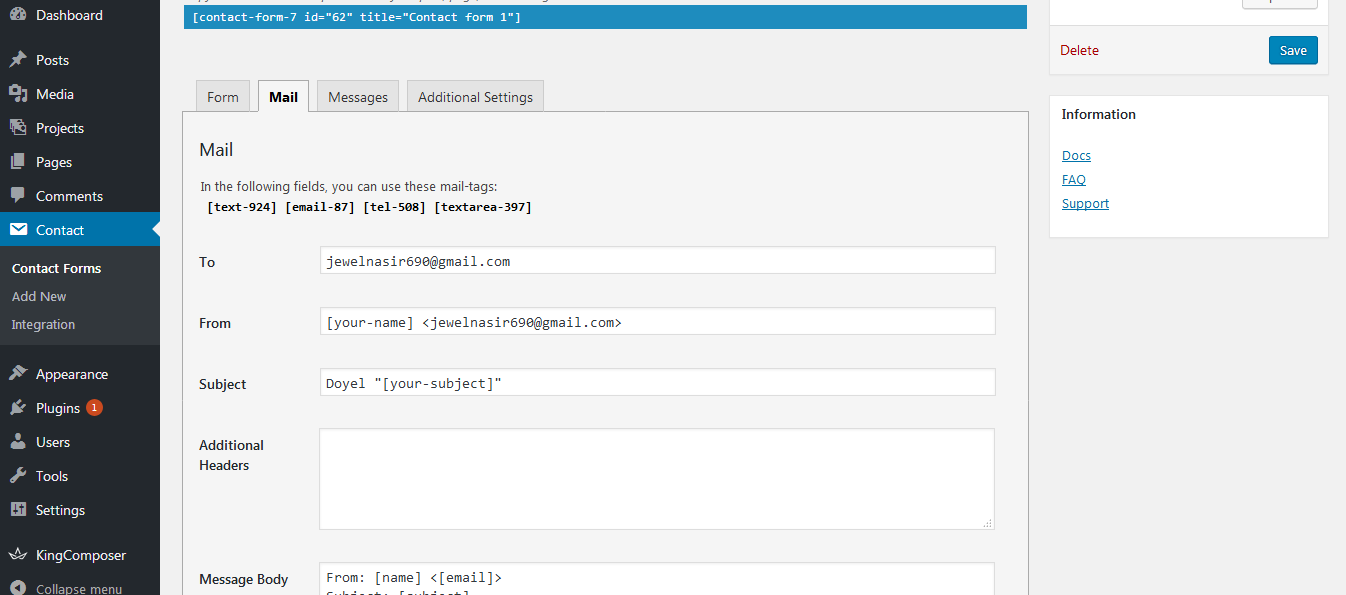
Step 1 - Log in to your WordPress Dashboard, go to Contact > Add New
Step 2 - Give a Name to your form and change Mail Info

Step 3 - Edit the Form field to change the Form Layout
		<div class="cleaning-form wow fadeInUp" data-wow-delay="0.6s">
		               <div class="row g-4">
		                  <div class="col-lg-6 col-md-6">
		                     <div class="clean-form-grp">
		                        <label>First Name</label>
		[text* text-51 placeholder "First name"]

		                     </div>
		                  </div>
		                  <div class="col-lg-6 col-md-6">
		                     <div class="clean-form-grp">
		                        <label>Address</label>
		[text* text-51 placeholder "Your Address"]
		                     </div>
		                  </div>
		                  <div class="col-lg-6 col-md-6">
		                     <div class="clean-form-grp">
		                        <label>Your Email</label>
		[email email-372 "Your Email"]
		                     </div>
		                  </div>
		                  <div class="col-lg-6 col-md-6">
		                     <div class="clean-form-grp">
		                        <label>Service</label>
		[text* text-51 placeholder "Service name"]
		                     </div>
		                  </div>
		                  <div class="col-lg-6 col-md-6">
		                     <div class="clean-form-grp">
		                        <label>Day of Service</label>
		[text* text-51 placeholder "Day of Service"]
		                     </div>
		                  </div>
		                  <div class="col-lg-12">
		                     <div class="clean-form-grp">
		                        <label>Add a Note</label>
		[textarea textarea-332 placeholder "Add a note"]
		                     </div>
		                  </div>
		                  <div class="col-lg-6">
		                     <div class="clean-form-grp">
		[submit class:cmn--btn class:cmn-alt2 "Submit Your Information"]
		                     </div>
		                  </div>
		               </div>
		            </div>
-
Create Contact Page:
Step 1 - Log in to your WordPress Administration Panel (Dasrdoard)..
Step 2 - Click on Pages > Add New.
Step 3 - Give your page a name then Change the Editor to Backend Editor ( you need to have the Elementor plugin activated )..
Step 4 - Click on the Edit with Element button

Step 5 - Select the Contact Addon.
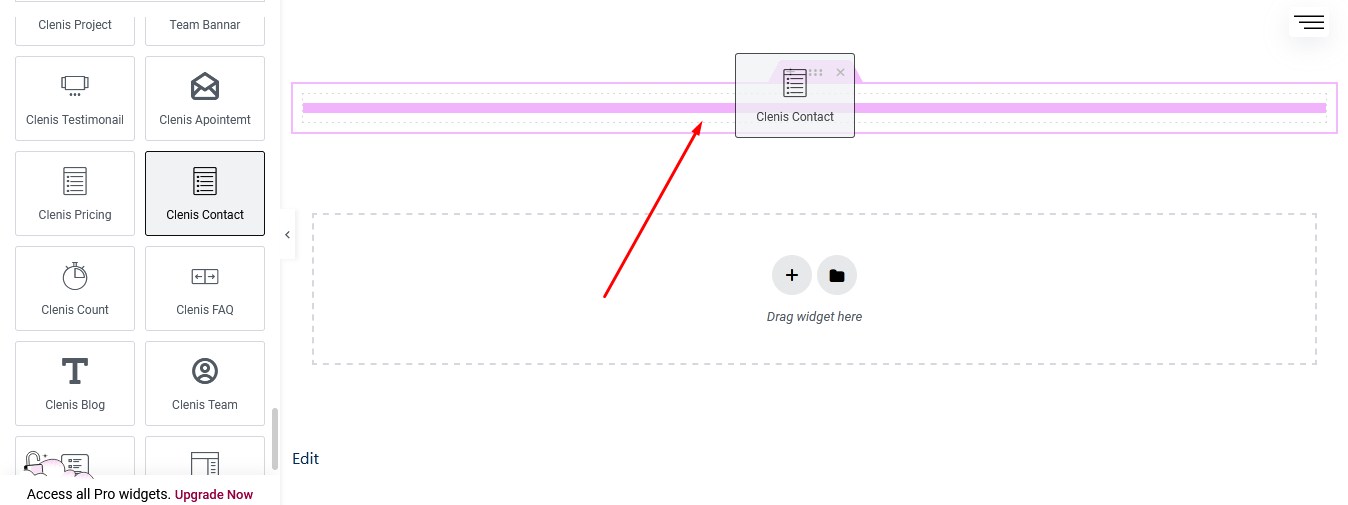
Step 6 - The Contact Form 7 Settings should appear. Select the Form you want to use you can also customize the Color and change the fields layout and button design.
Step 7 - Update / Publish your page
-
Create Contact Widget at the footer:
<ul class="get__touch">
 <li>
    <svg width="16" height="15" viewBox="0 0 16 15" fill="none" xmlns="http://www.w3.org/2000/svg">
       <path d="M3.84091 12.25L0.5 14.875V1C0.5 0.58579 0.83579 0.25 1.25 0.25H14.75C15.1642 0.25 15.5 0.58579 15.5 1V11.5C15.5 11.9142 15.1642 12.25 14.75 12.25H3.84091ZM3.32211 10.75H14V1.75H2V11.7888L3.32211 10.75ZM7.25 5.5H8.75V7H7.25V5.5ZM4.25 5.5H5.75V7H4.25V5.5ZM10.25 5.5H11.75V7H10.25V5.5Z" fill="#2295FF"/>
    </svg>
    <a href="mailto:helloclenis@gmail.com">
       helloclenis@gmail.com
    </a>
 </li>
 <li>
    <svg width="14" height="14" viewBox="0 0 14 14" fill="none" xmlns="http://www.w3.org/2000/svg">
       <path d="M5.02417 6.01158C5.7265 7.2466 6.7534 8.2735 7.98842 8.9758L8.6518 8.04708C8.87238 7.73838 9.2887 7.64297 9.6217 7.82485C10.6768 8.40123 11.8428 8.75148 13.0592 8.84778C13.4492 8.87868 13.75 9.20417 13.75 9.59545V12.9426C13.75 13.3271 13.4591 13.6493 13.0766 13.6886C12.6792 13.7295 12.2783 13.75 11.875 13.75C5.45469 13.75 0.25 8.5453 0.25 2.125C0.25 1.7217 0.270565 1.32078 0.311418 0.92332C0.350725 0.540812 0.672955 0.25 1.05749 0.25H4.40456C4.79583 0.25 5.12135 0.55078 5.15222 0.940817C5.2485 2.15716 5.59877 3.32323 6.17515 4.37833C6.35703 4.7113 6.26162 5.12766 5.95292 5.34818L5.02417 6.01158ZM3.13319 5.5189L4.55815 4.50107C4.1541 3.62885 3.87721 2.70387 3.73545 1.75H1.7568C1.75227 1.87474 1.75 1.99975 1.75 2.125C1.75 7.71685 6.28315 12.25 11.875 12.25C12.0002 12.25 12.1253 12.2478 12.25 12.2432V10.2645C11.2962 10.1228 10.3712 9.84587 9.49892 9.44185L8.4811 10.8668C8.06935 10.7069 7.6717 10.5186 7.29055 10.3046L7.24697 10.2797C5.77728 9.44402 4.55601 8.22272 3.72025 6.75303L3.69545 6.70945C3.48137 6.3283 3.29316 5.93065 3.13319 5.5189Z" fill="#2295FF"/>
    </svg>
    <span">
       +48 74326 02396
    </span>
 </li>
 <li>
    <svg width="14" height="14" viewBox="0 0 14 14" fill="none" xmlns="http://www.w3.org/2000/svg">
       <path d="M5.02417 6.01158C5.7265 7.2466 6.7534 8.2735 7.98842 8.9758L8.6518 8.04708C8.87238 7.73838 9.2887 7.64297 9.6217 7.82485C10.6768 8.40123 11.8428 8.75148 13.0592 8.84778C13.4492 8.87868 13.75 9.20417 13.75 9.59545V12.9426C13.75 13.3271 13.4591 13.6493 13.0766 13.6886C12.6792 13.7295 12.2783 13.75 11.875 13.75C5.45469 13.75 0.25 8.5453 0.25 2.125C0.25 1.7217 0.270565 1.32078 0.311418 0.92332C0.350725 0.540812 0.672955 0.25 1.05749 0.25H4.40456C4.79583 0.25 5.12135 0.55078 5.15222 0.940817C5.2485 2.15716 5.59877 3.32323 6.17515 4.37833C6.35703 4.7113 6.26162 5.12766 5.95292 5.34818L5.02417 6.01158ZM3.13319 5.5189L4.55815 4.50107C4.1541 3.62885 3.87721 2.70387 3.73545 1.75H1.7568C1.75227 1.87474 1.75 1.99975 1.75 2.125C1.75 7.71685 6.28315 12.25 11.875 12.25C12.0002 12.25 12.1253 12.2478 12.25 12.2432V10.2645C11.2962 10.1228 10.3712 9.84587 9.49892 9.44185L8.4811 10.8668C8.06935 10.7069 7.6717 10.5186 7.29055 10.3046L7.24697 10.2797C5.77728 9.44402 4.55601 8.22272 3.72025 6.75303L3.69545 6.70945C3.48137 6.3283 3.29316 5.93065 3.13319 5.5189Z" fill="#2295FF"/>
    </svg>
    <span>
       +48 64453 96533
    </span>
 </li>
 <li>
    <svg width="16" height="16" viewBox="0 0 16 16" fill="none" xmlns="http://www.w3.org/2000/svg">
       <path d="M5.75 0.75V2.25H10.25V0.75H11.75V2.25H14.75C15.1642 2.25 15.5 2.58579 15.5 3V15C15.5 15.4142 15.1642 15.75 14.75 15.75H1.25C0.83579 15.75 0.5 15.4142 0.5 15V3C0.5 2.58579 0.83579 2.25 1.25 2.25H4.25V0.75H5.75ZM14 8.25H2V14.25H14V8.25ZM4.25 3.75H2V6.75H14V3.75H11.75V5.25H10.25V3.75H5.75V5.25H4.25V3.75Z" fill="#2295FF"/>
    </svg>
    <span>
       Mon - Fri 12:00 - 18:00
    </span>
 </li>
 <li>
    <svg width="14" height="17" viewBox="0 0 14 17" fill="none" xmlns="http://www.w3.org/2000/svg">
       <path d="M7 14.6746L10.7123 10.9623C12.7625 8.91208 12.7625 5.58794 10.7123 3.53769C8.66208 1.48744 5.33794 1.48744 3.28769 3.53769C1.23744 5.58794 1.23744 8.91208 3.28769 10.9623L7 14.6746ZM7 16.7959L2.22703 12.023C-0.40901 9.3869 -0.40901 5.11307 2.22703 2.47703C4.86307 -0.15901 9.1369 -0.15901 11.773 2.47703C14.409 5.11307 14.409 9.3869 11.773 12.023L7 16.7959ZM7 8.75C7.82845 8.75 8.5 8.07845 8.5 7.25C8.5 6.42157 7.82845 5.75 7 5.75C6.17155 5.75 5.5 6.42157 5.5 7.25C5.5 8.07845 6.17155 8.75 7 8.75ZM7 10.25C5.34314 10.25 4 8.90683 4 7.25C4 5.59314 5.34314 4.25 7 4.25C8.65683 4.25 10 5.59314 10 7.25C10 8.90683 8.65683 10.25 7 10.25Z" fill="#2295FF"/>
    </svg>
    <span>
       Hilton, TY56/90 NY, USA
    </span>
 </li>
</ul>
-
-
Set Up Footer:
Step 1 - Login to your WordPress Dasrdoard.
Step 2 - Go to Customizer Settings > Footer Settings.

-
Set Up Widgets:
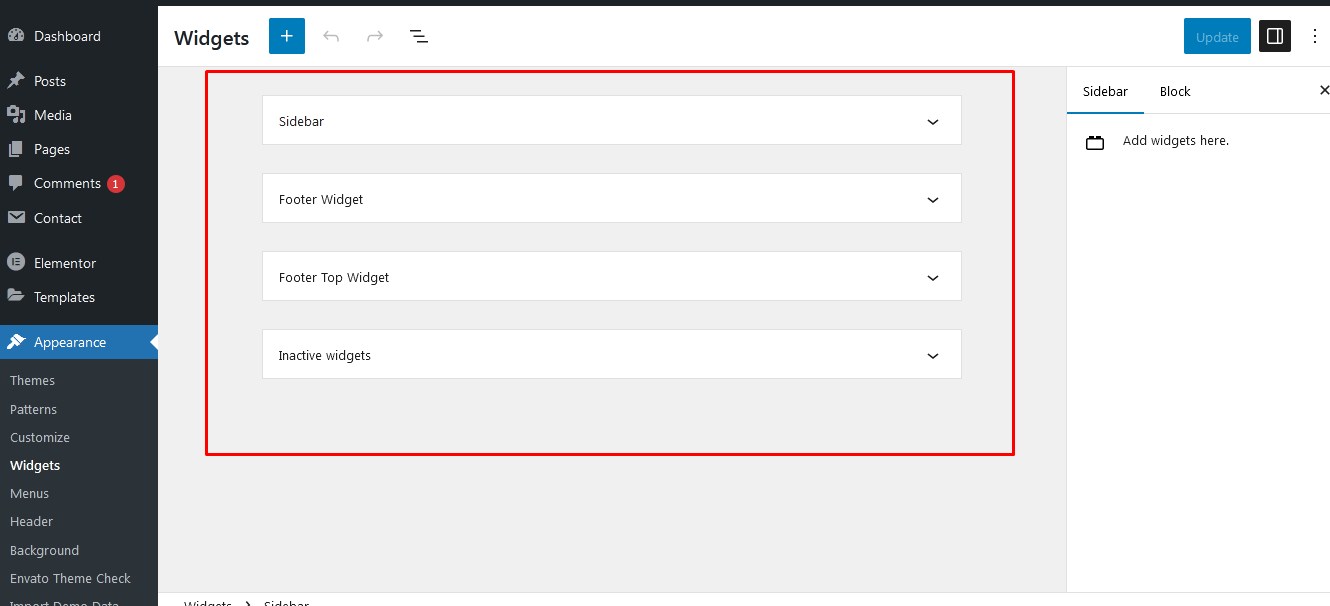
Step 1 - Login to your WordPress Dasrdoard.
Step 2 - Go to Appearance Settings > Widgets.
-
Set Up Subscription:
Step 1 - Login to your WordPress Dasrdoard.
Step 2 - Go to MC4WP > Form.
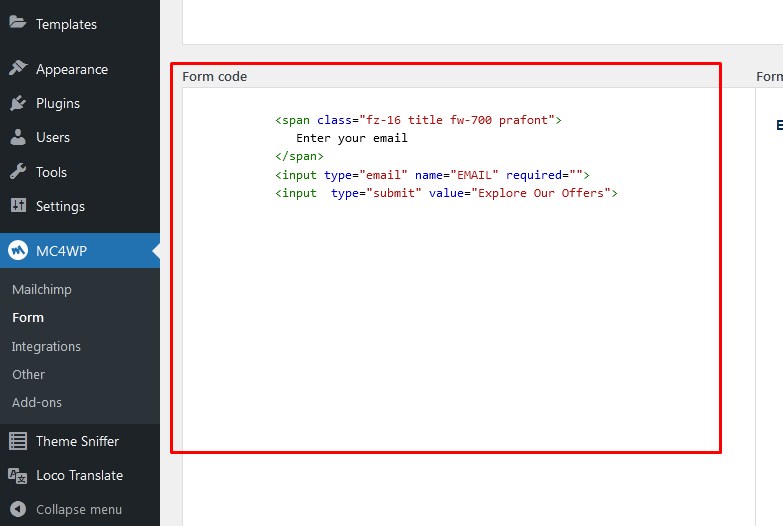
Step 3 - Find a shortcode. copy the shortcode and drop it where you need like elementor addon or widgets by widgets shortcode block and publish it
Customizer Settings - top
To access Theme Options go to your admin Dashboard Navigate to Appearance >> Customizer Settings
- Header Settings: Manage header setting from here.
- Site Identity: Manage site setting from here.
- Blogpage Settings: Manage blogpage setting from here.
- Singlepage Settings: Manage singlepage setting from here.
- General Settings: Manage general setting from here.
- Styling Settings: Manage styling setting from here.
- Error Settings: Manage error setting from here.
- Footer Settings: Manage footer setting from here.
- Colors Settings: Manage colors setting from here.
- Header Image Settings: Manage header image setting from here.
- Background Image Settings: Manage background image setting from here.
- Menus Settings: Manage menus setting from here.
- Widgets Settings: Manage widgets setting from here.
- Homepage Settings: Manage widgets homepage setting from here.
- Additional css Settings: Manage widgets additional css setting from here.
How to translate the theme - top
Use the plugin "Loco Translate":
Loco Translate provides in-browser editing of WordPress translation files.
It also provides localization tools for developers, such as extracting strings and generating templates.
Once again, thank you so much for purchasing this Clenis – Cleaning Services Wordpress Theme. As We said at the beginning, We'd be glad to help you if you have any questions relating to this Clenis – Cleaning Services Wordpress Theme. No guarantees, but We'll do our best to assist. If you have a more general question relating to the Clenis – Cleaning Services Wordpress Theme on Themeforest, you might consider visiting the forums and asking your question in the "Item Discussion" section.
4damsthemes